Help
Image recognition
The automatic recognition of the decoration class of sherd starts from the image of the sherd that may be taken directly through the camera or from the galleries of the device. The process consists of the following steps:
- Step1: Select the image
- Step2: Modify the image using the manipulation tools
- Step3: Isolate the sherd in the image
- Step4: Evaluate the results
- Step5: Save the results (if the user is logged in and the results are good)
- Step6: Manually classify the image by visual comparison
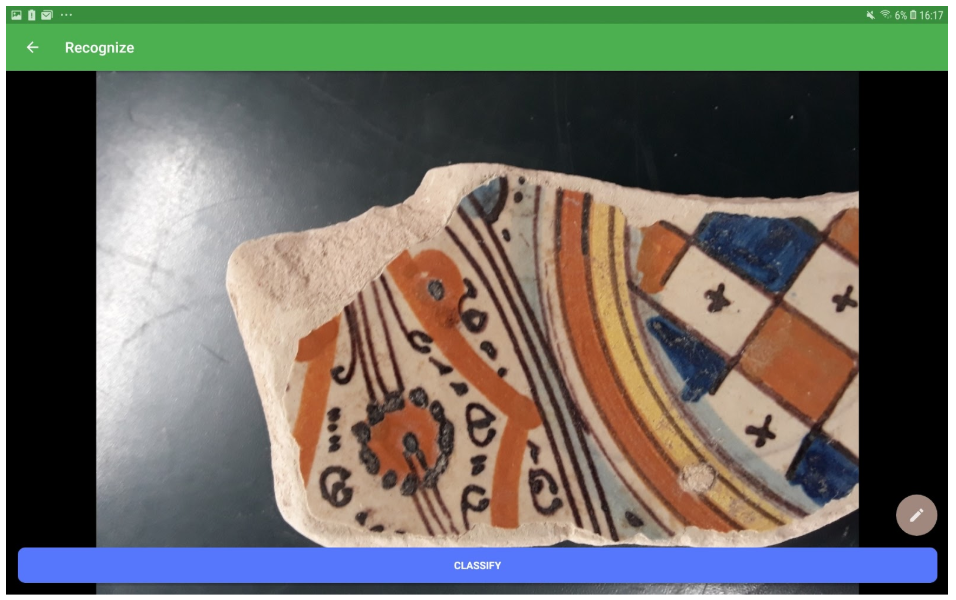
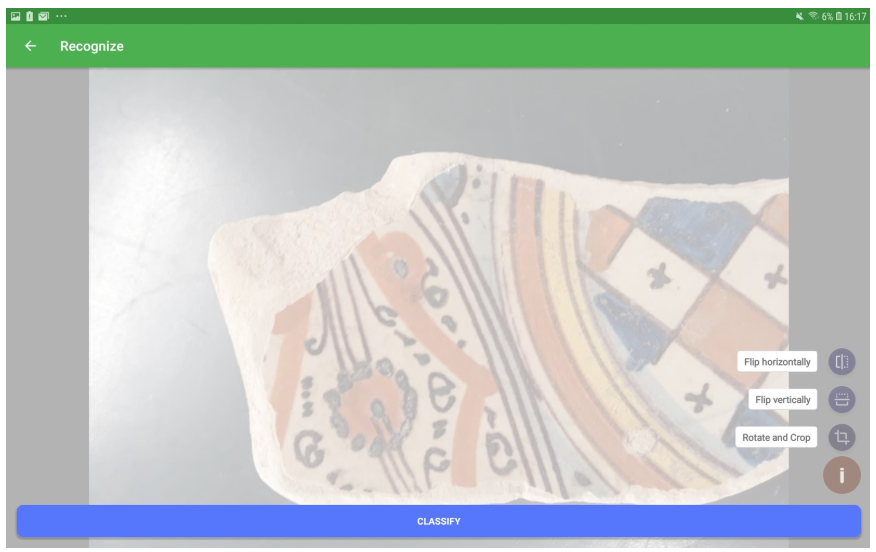
If the image needs to be adjusted, the user may use the tools available in the menu button (pen on brown background for flipping (horizontally, vertically) rotating and cropping.

If the image needs to be adjusted, the user may use the tools available in the menu button (pen on brown background - see image below) for flipping (horizontally, vertically) rotating and cropping.

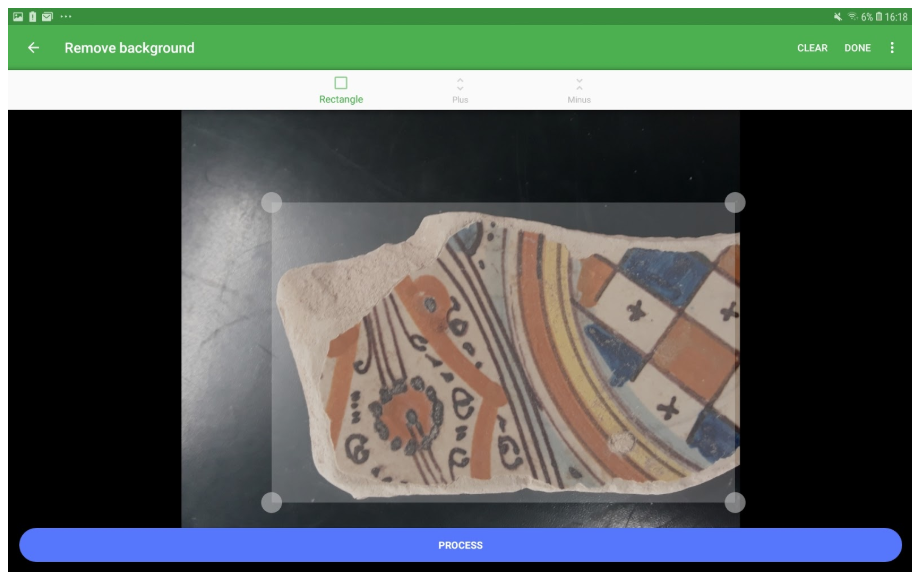
Once the image is good, tapping on “Classify” the user moves to the second step: isolating the sherd (see image below). In this step, the goal is to obtain a clean image of the sherd where the background does not influence the recognition model. Usually, simply selecting the area containing the sherd will be enough but some time it may be necessary to remove the background with more advanced tools. The Step 2 interface provides an automatic background removal tool (the “Process” button), the identification rectangle (the most used) or a technique based on telling the GrabCut (see D6.3) algorithm which areas should remain (sherd) and which should be removed (background).
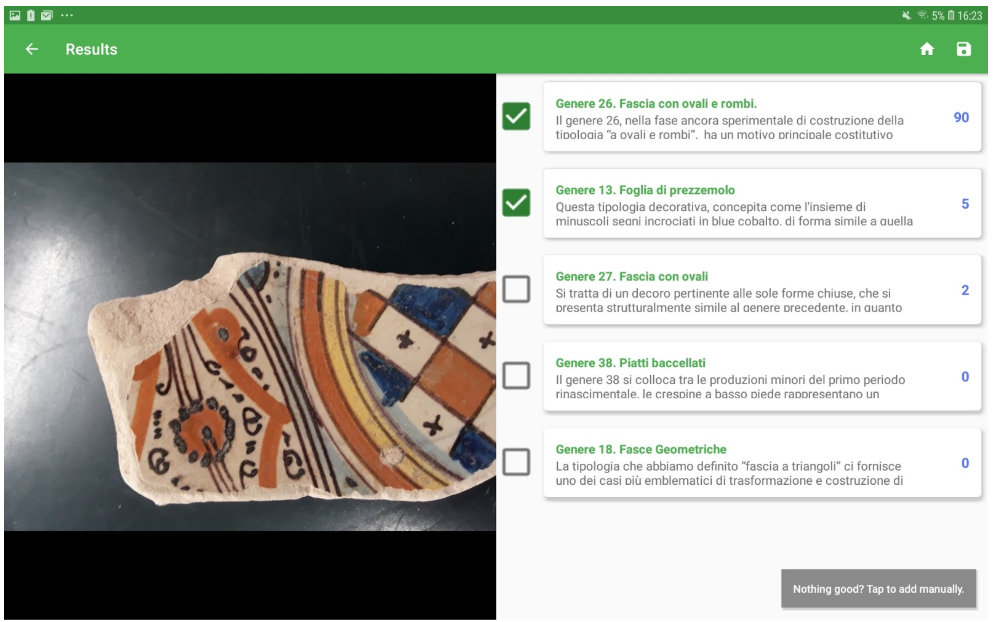
Tapping on the “Done” button (top right), the recogniser will be launched. This step requires Internet connectivity and takes the processed image and try to identify the decoration classes it belongs to. The recogniser returns 5 results ordered by a probability indicator (see the picture below).

If the user is satisfied by the results, may use the save button on the top right corner to save the results as a new sherd or inside an existing sherd.
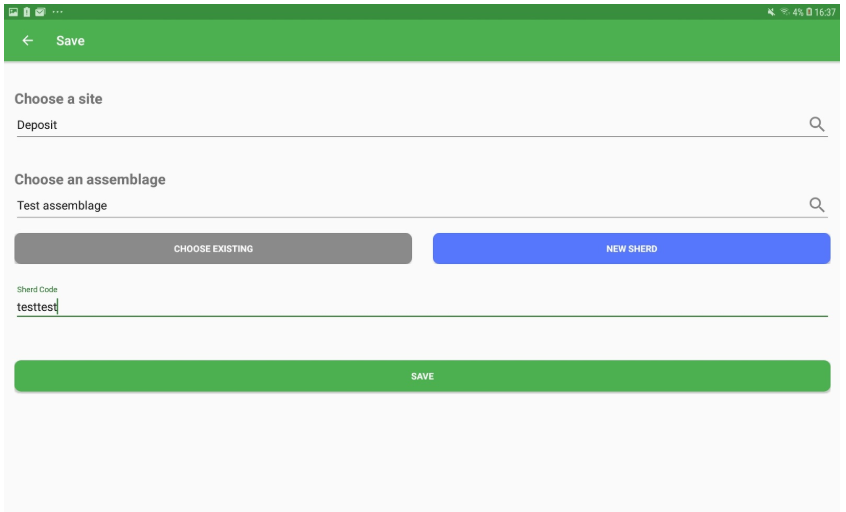
Is important to note that only authenticated user can see the save button. Saving the results means telling the app in which site/assemblage the sherd should be saved and if we want to save it as a new sherd, which name assigns to it.
If the user is not satisfied by the automatically generated results may use the “Nothing good? Tap to add manually” button on the bottom right corner of the result window, to try a manual classification.
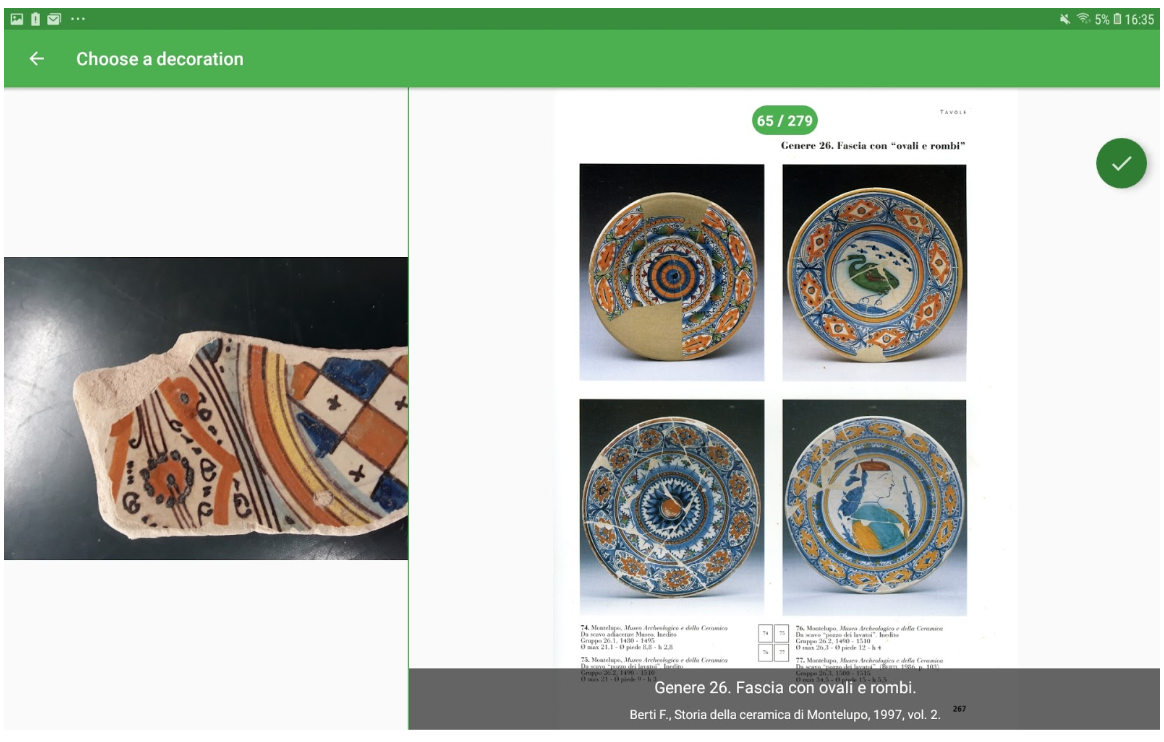
Essentially the user is able to visually compare the real potsherd with the images available in the catalogue (right-hand side in the image above) and when he/she finds a visual match, he/she uses the check button to save the selection. The images on the right may be changed swiping horizontally right-to-left (next image) or left-to-right (previous image).
